
How to ride
USING THE ELECTRIC ASSIST
**For the best experience, please be sure to check the bikes available battery prior to starting your ride.**
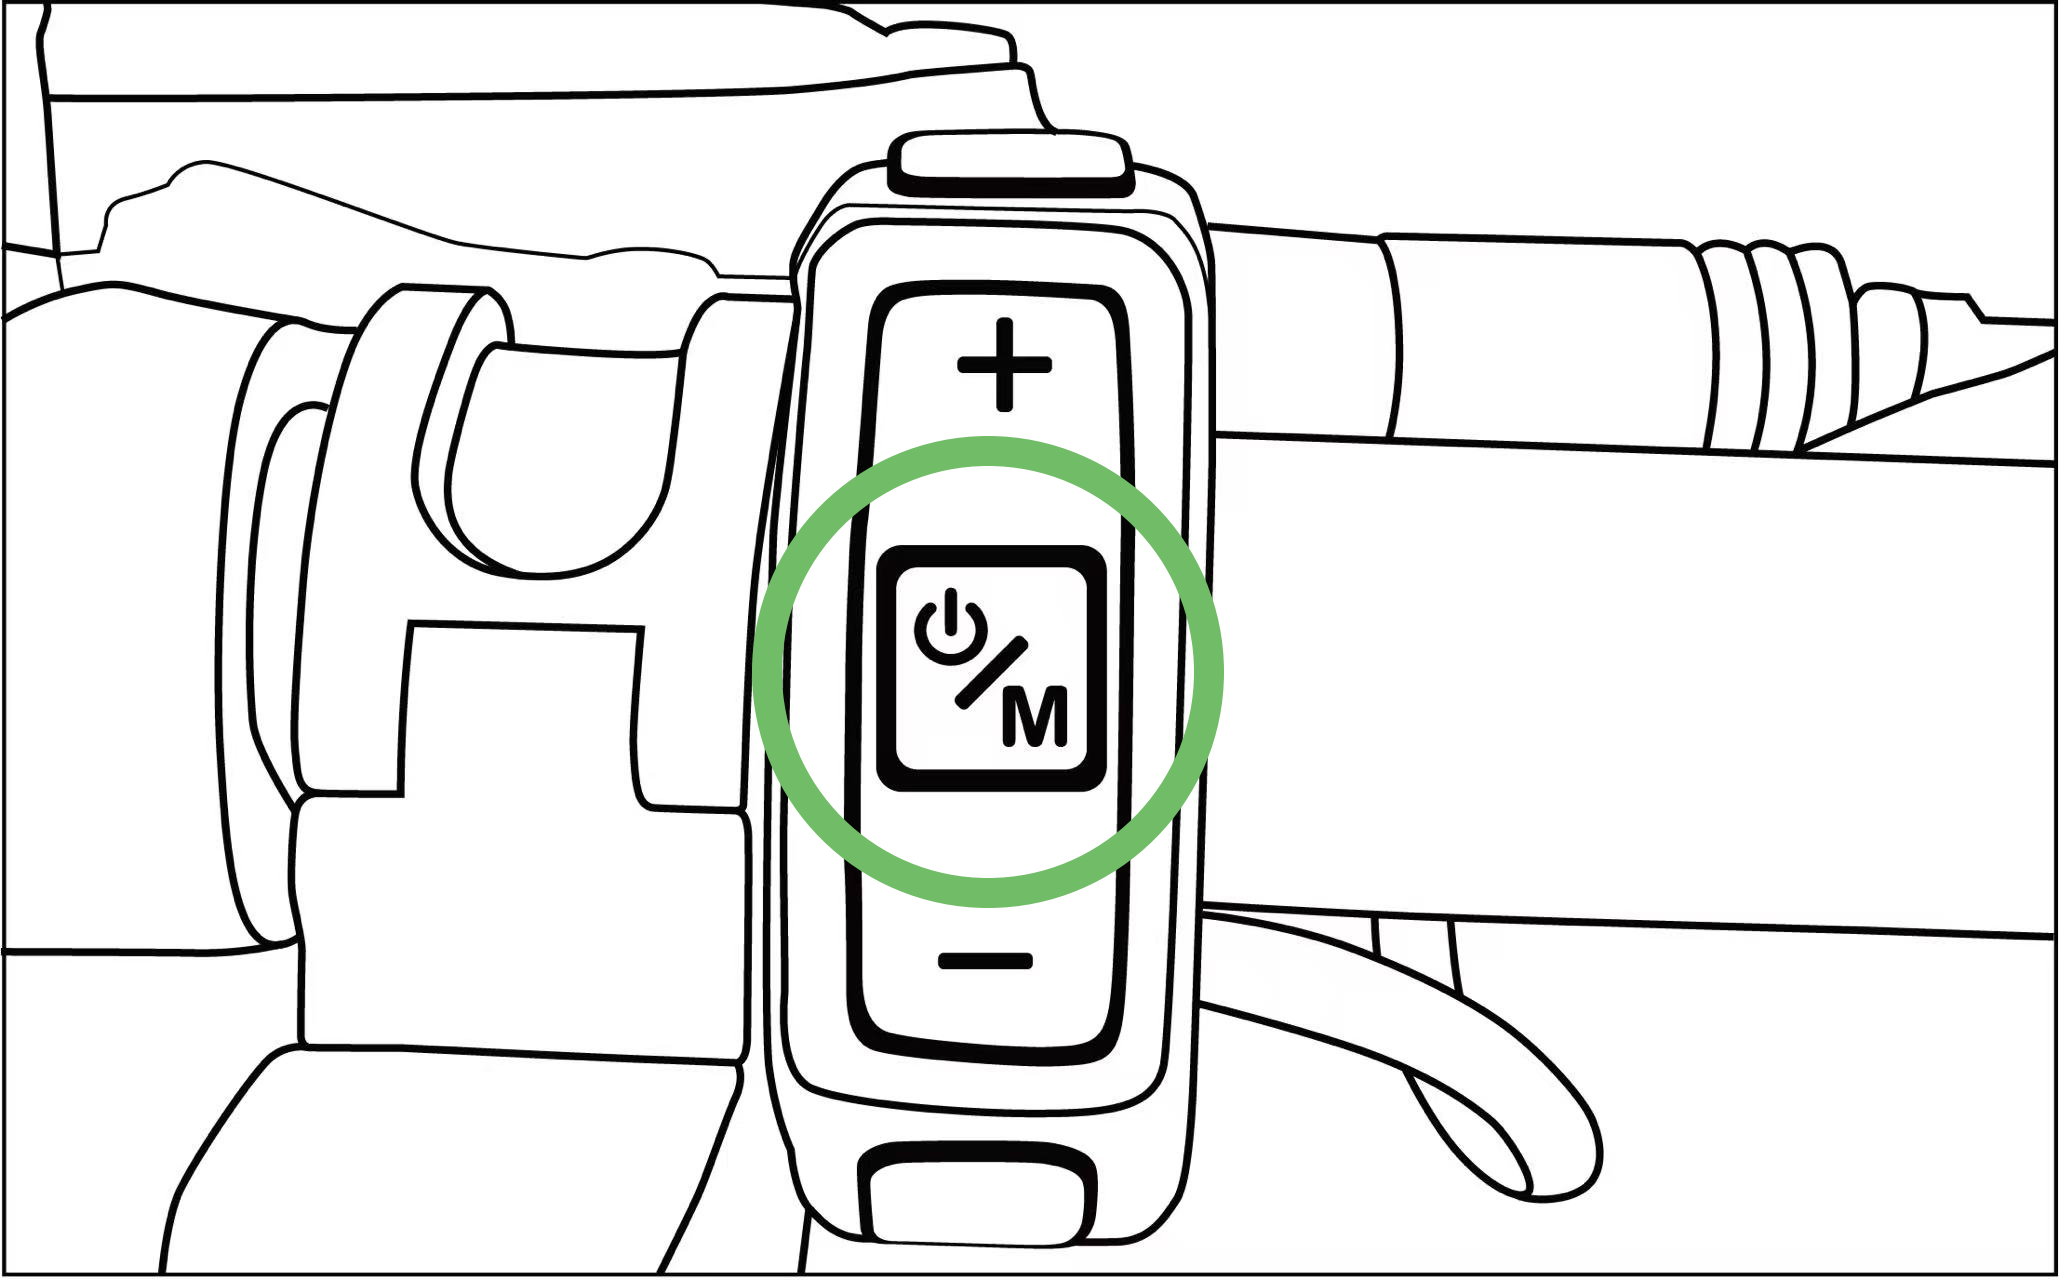
1. Power On The Battery
Some bikes’ power-on button is located on the bottom.
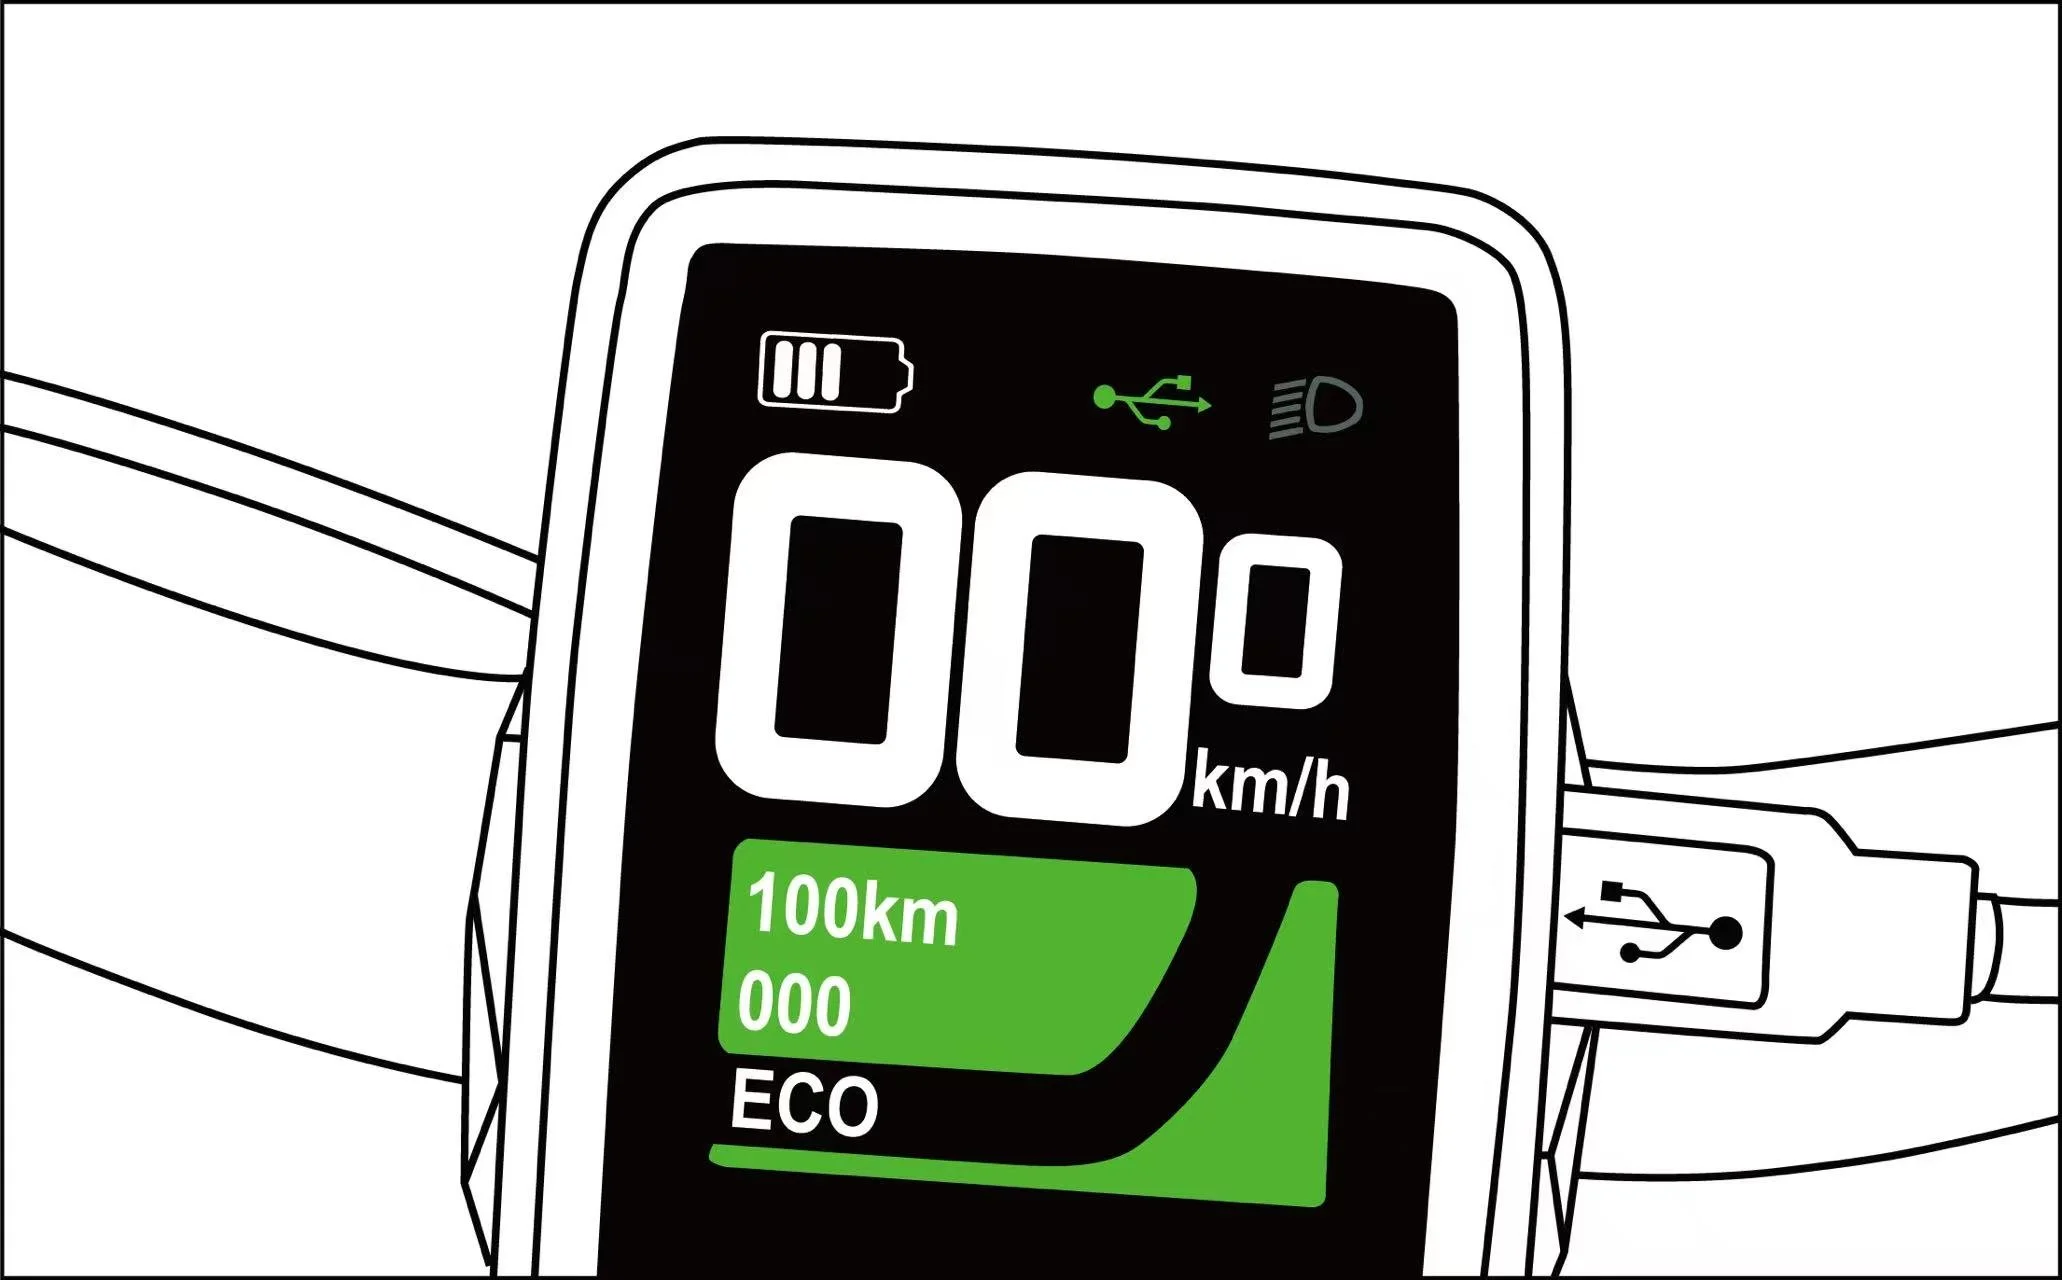
2. Check The Battery Level
Once the bike is powered on, check the battery level to see if it will last your journey.
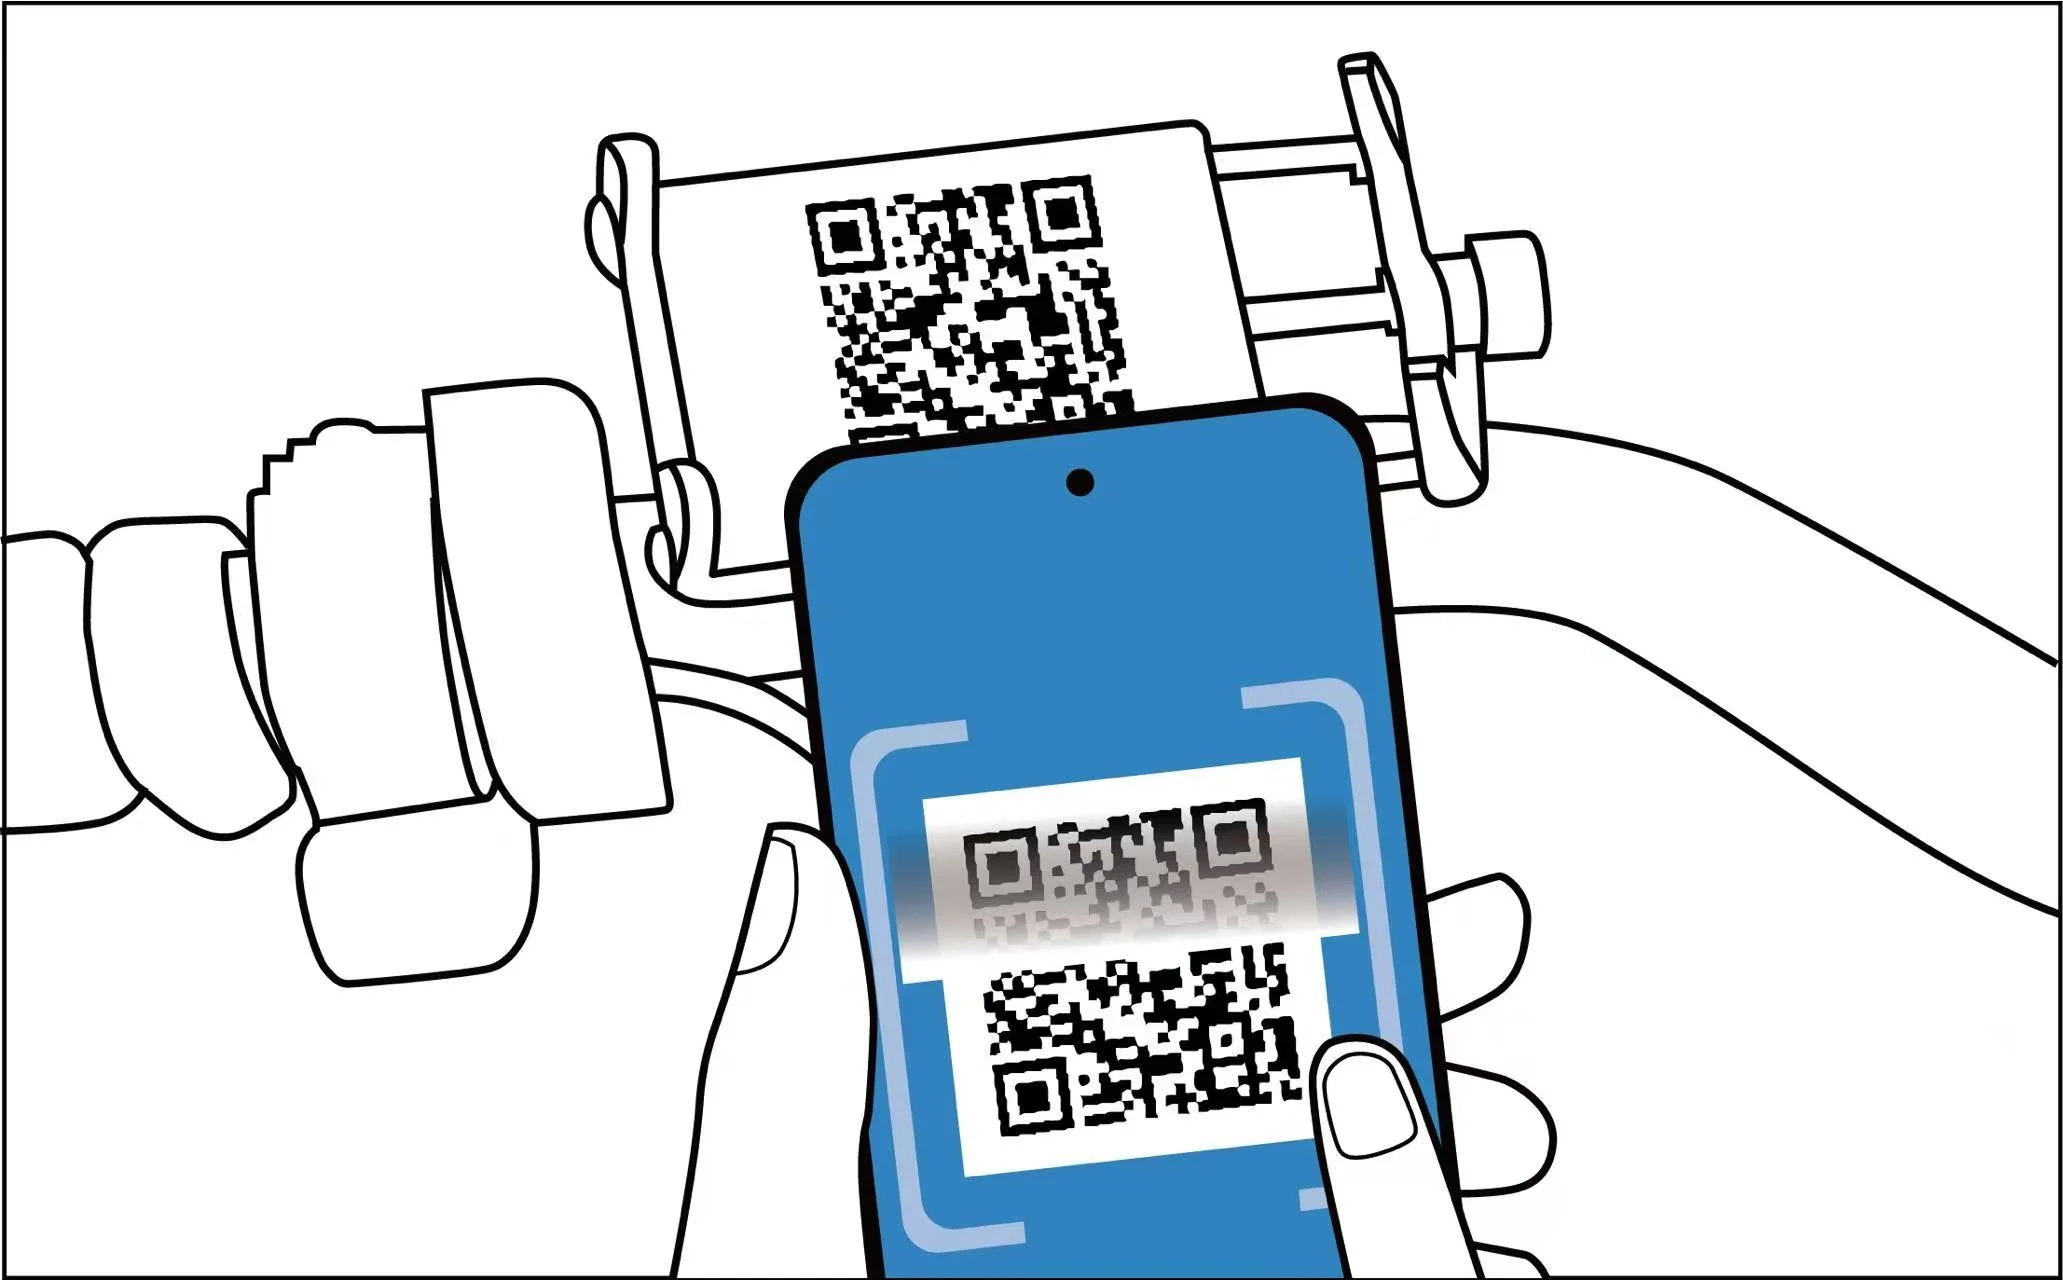
3. Use APP to Scan the QR code
Use Revive Velo APP to scan the QR code located on the bike in order to unlock the bike.
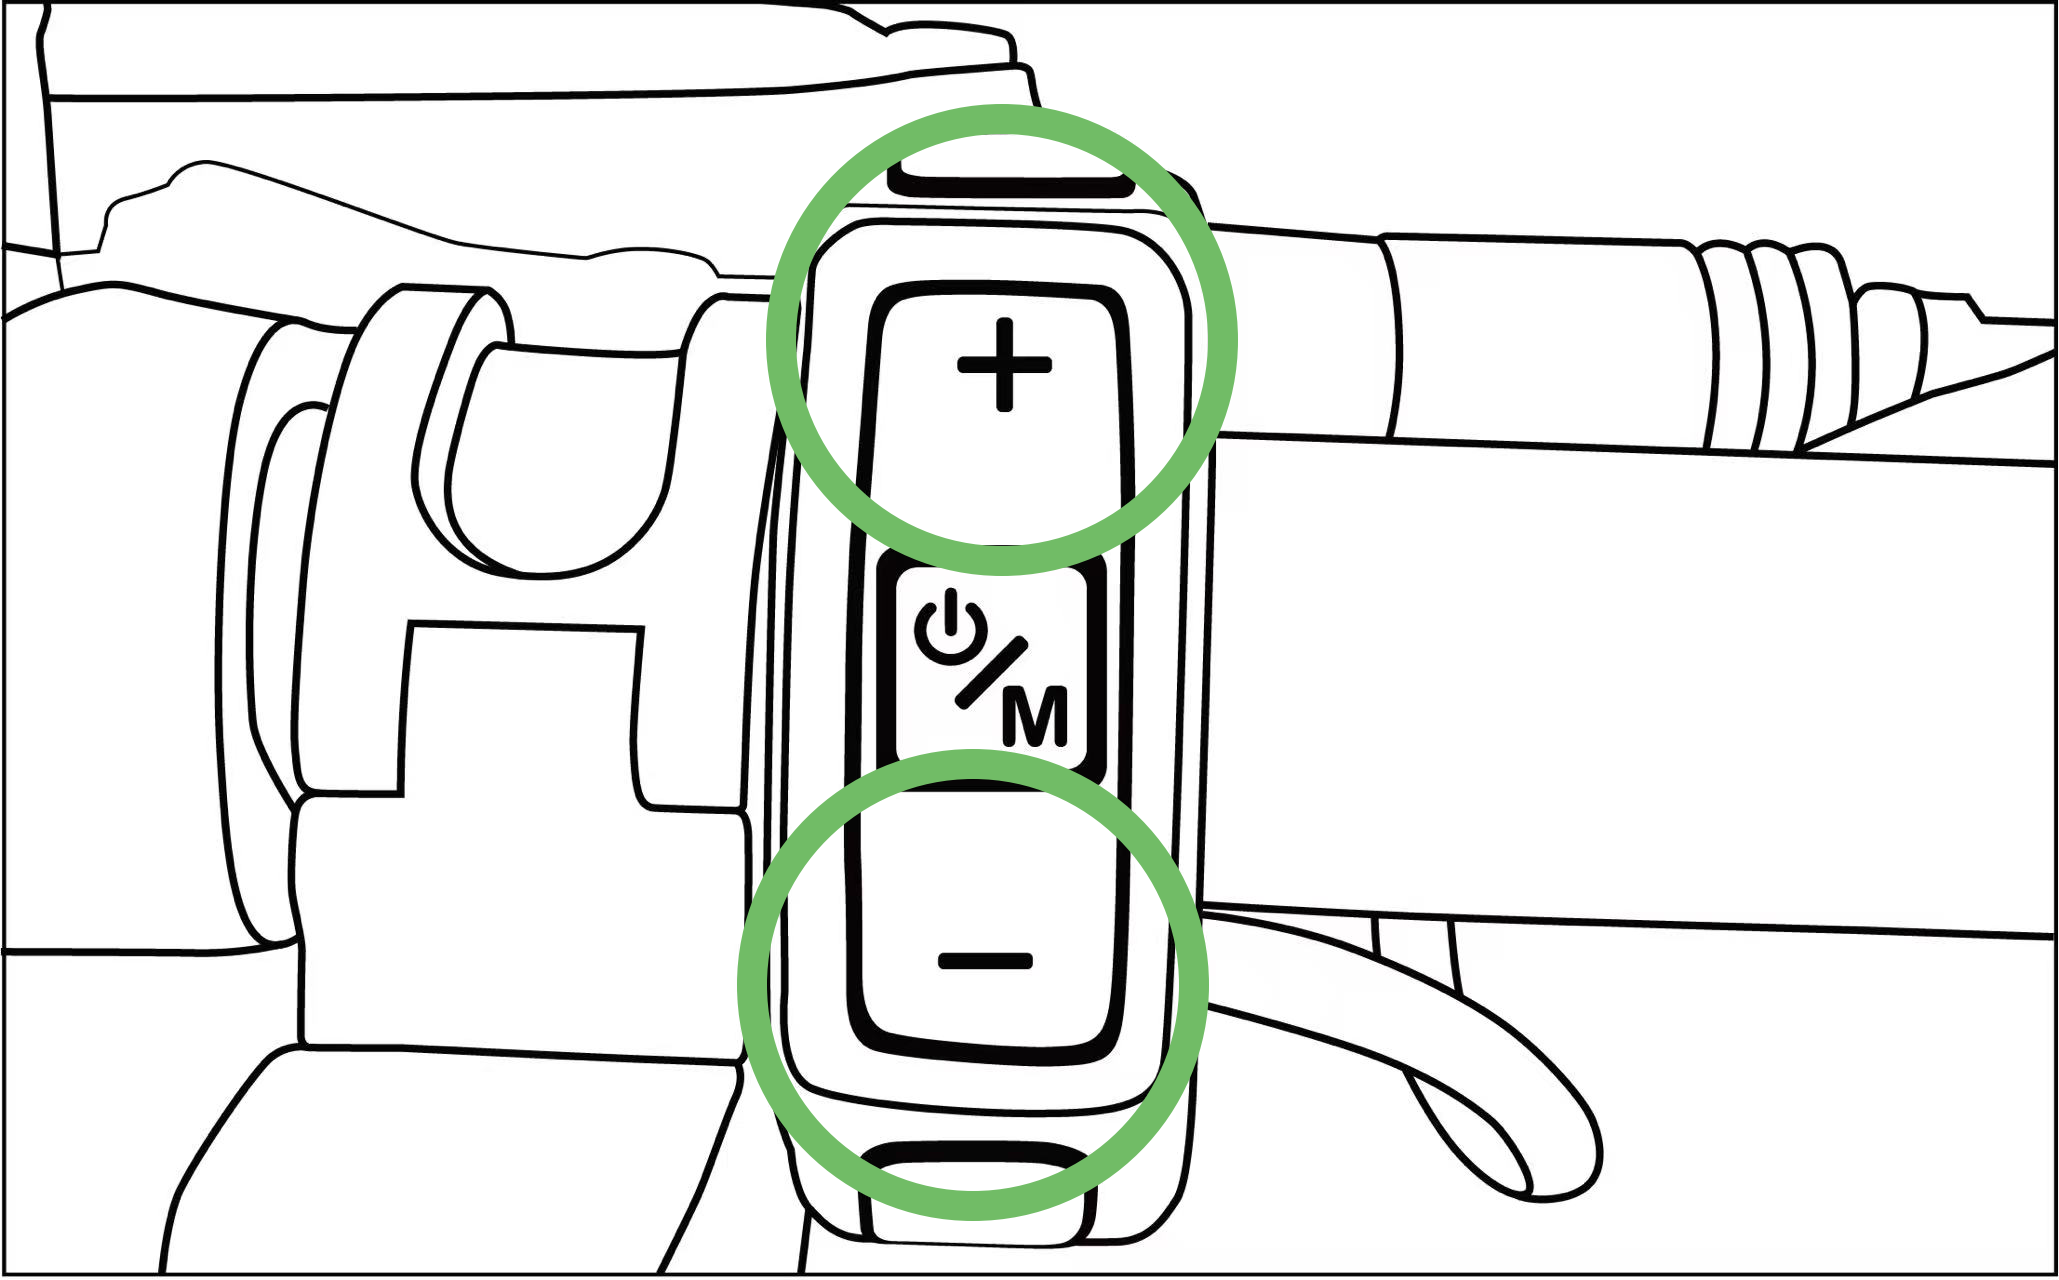
4. Choose Your Assist Level
Adjust your power assist levels with the up and down arrows. The more assist you choose the faster the battery drains.
PAUSING YOUR RIDE, AND WHY
**The locks have a sensitive Gyro that detects movement. Please refrain from touching or moving the bikes while pausing the ride**
Pausing is a great way to maximize your time spent with our Revival Velo Bikes. Pausing allows you to use the bikes for activities such as wine touring, running errands or stopping off for a quick bite to eat. Pausing reduces the rate at which the bikes are charged, and reserves the bike for you, making them unavailable for other users. Please note pausing a ride inhibits your ability to end the ride, only an active ride can be ended.
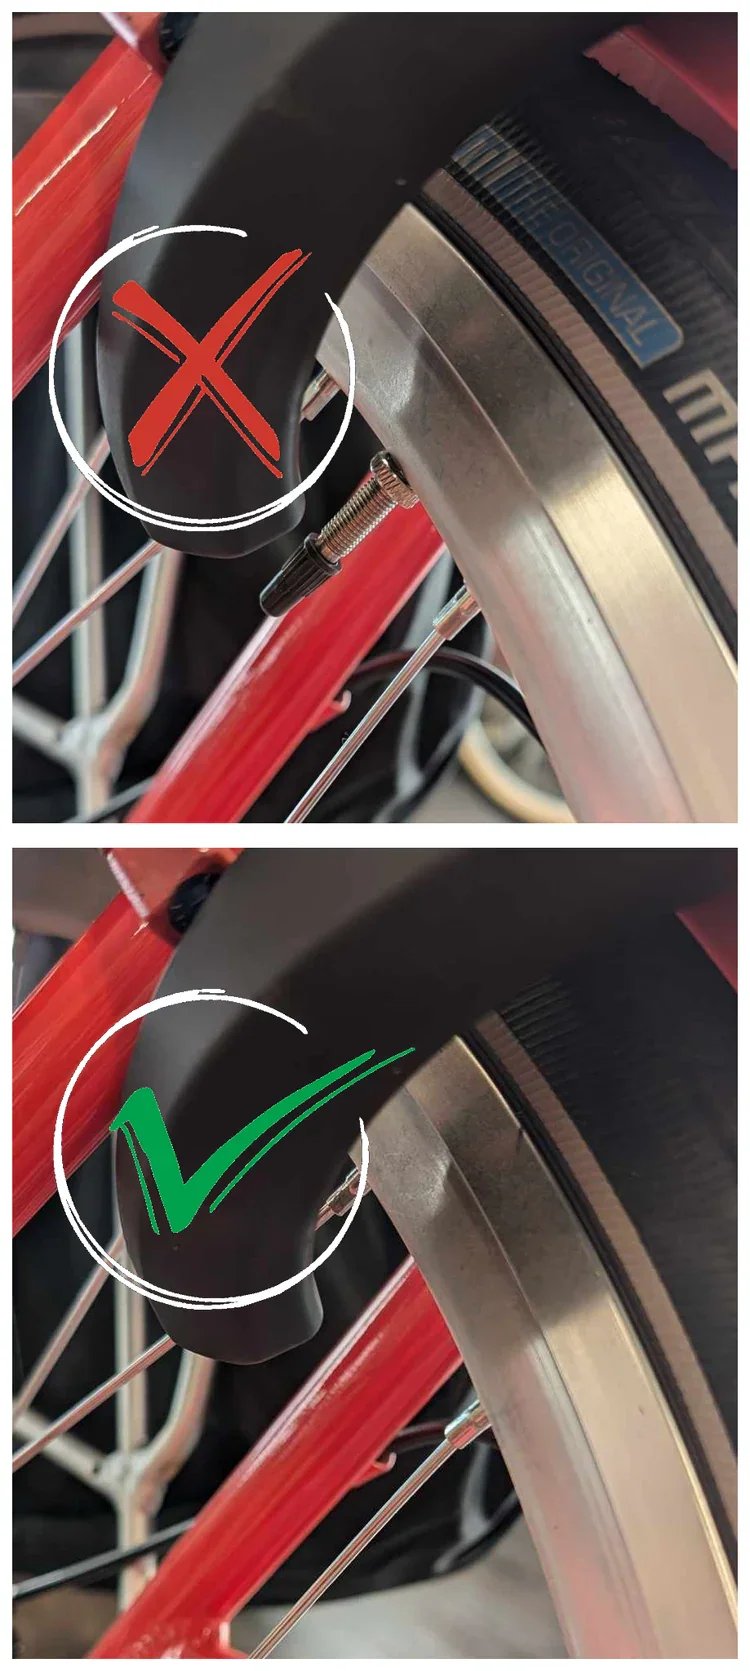
1. PLACE THE BIKE IN A SAFE LOCATION
Once the bike in a safe location, ensure the lock is free from obstruction and can close without contacting the spokes or air valve on the wheel.
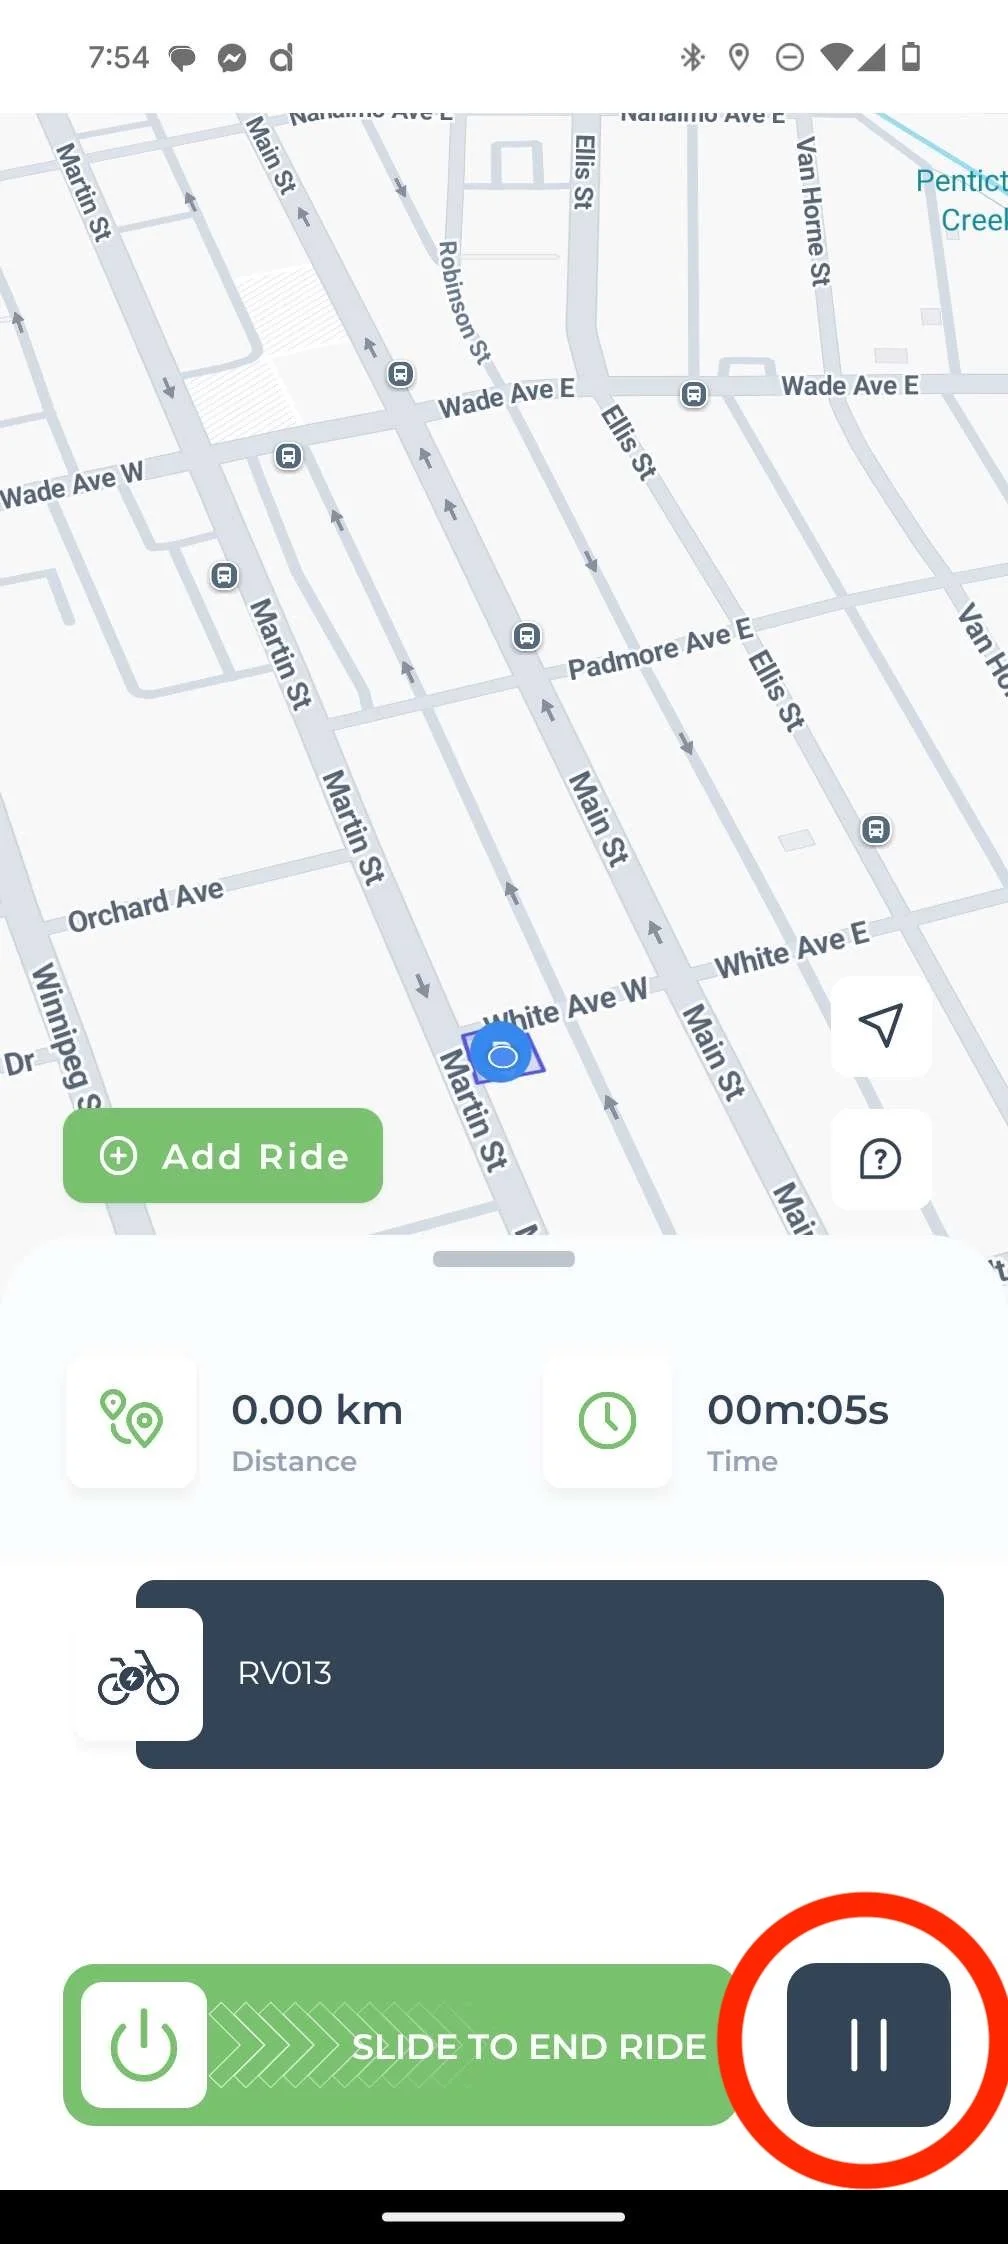
2. PRESS PAUSE!
In the bottom right locate and press the pause button. The lock will close and chime when locked.
3. RE-STARTING YOUR RIDE.
In the bottom right locate and press the “Play” Button, The lock will unlock and chime when ready to ride.
ENDING YOUR RIDE, PARKING THE BIKE
**The locks have a sensitive Gyro that detects movement. Please refrain from touching or moving the bikes while ending the ride**
*Please note that the ride can not be ended on a paused bike, only active rides can be ended*
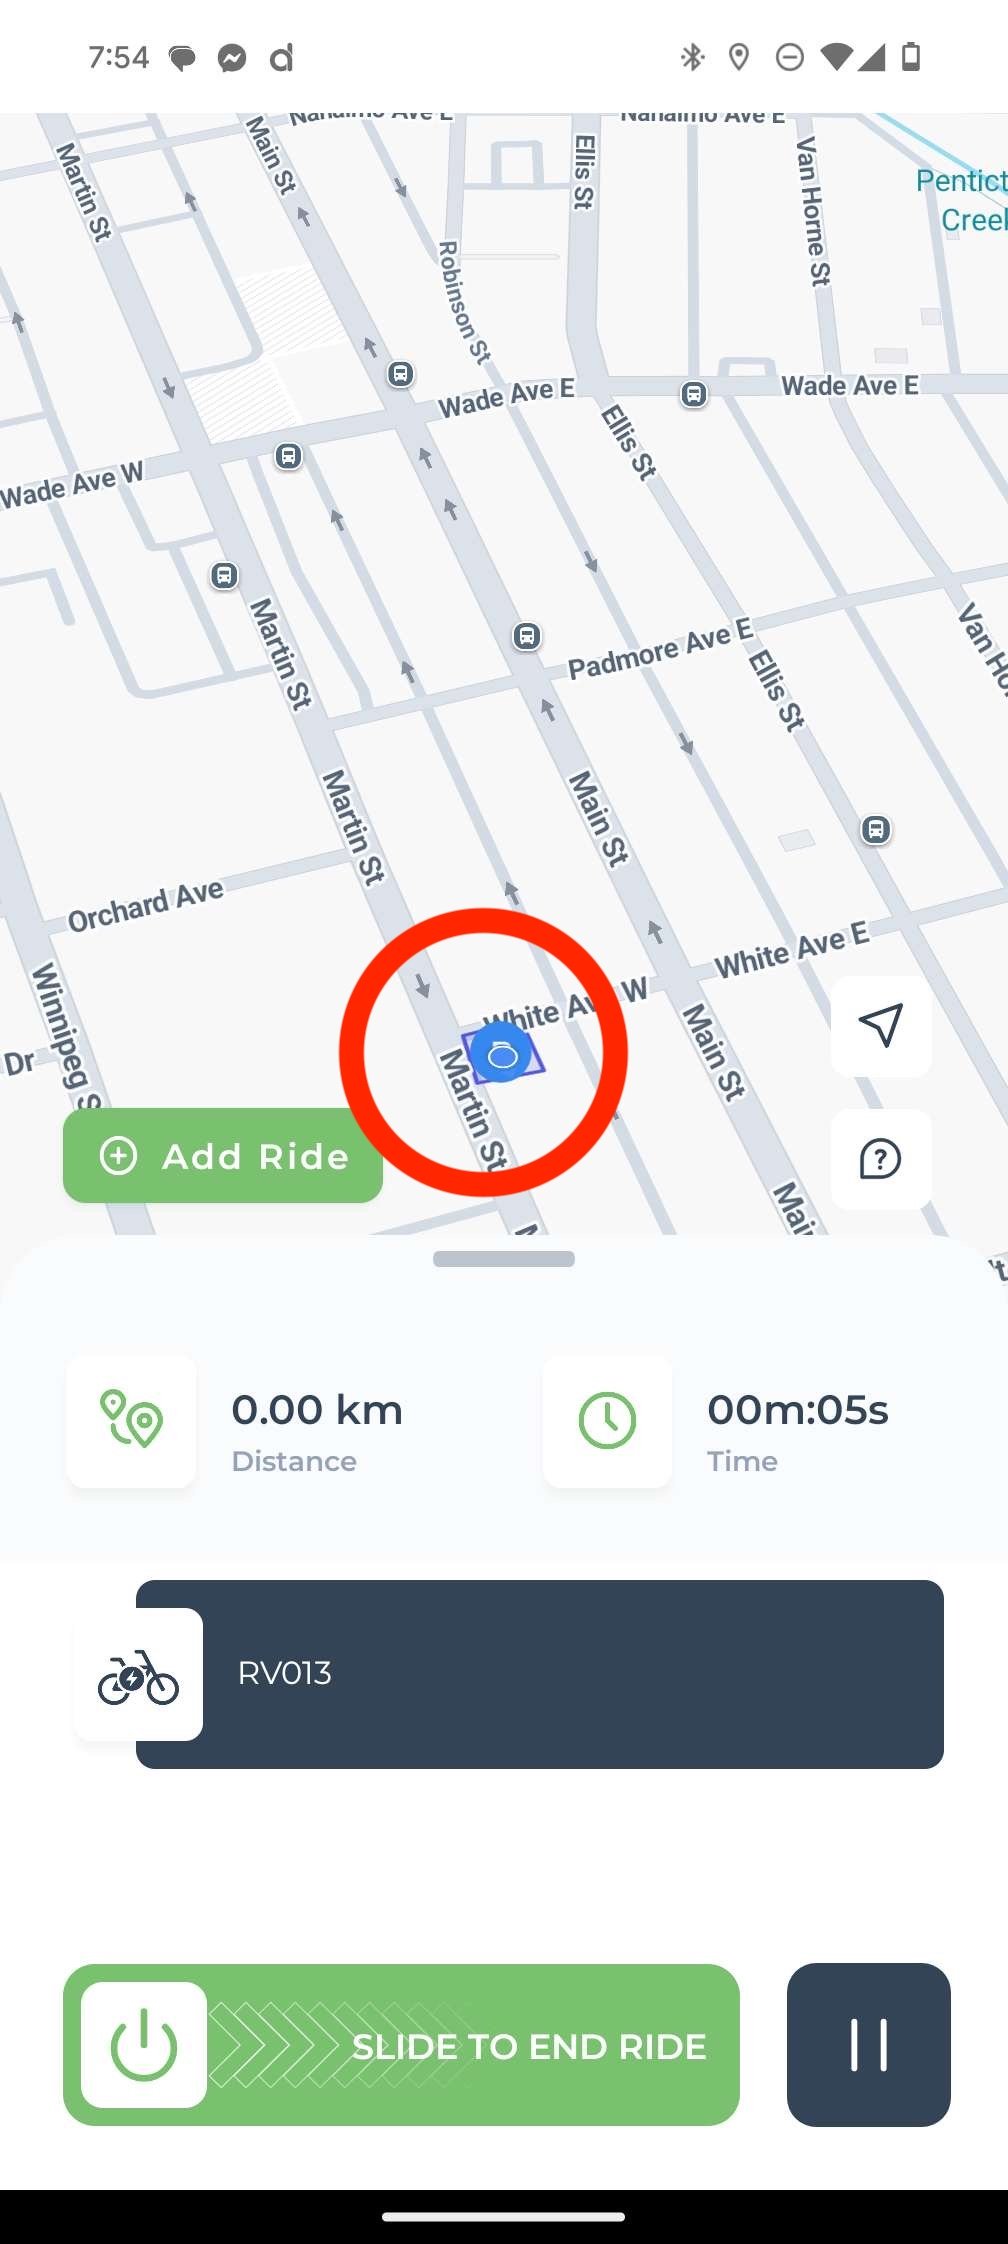
1. RETURN THE BIKE TO ITS FINAL LOCATION
Return the bike to the designated parking area. Allow 30 - 60 second for the GPS to locate the bike and the gyro to stop detecting motion before ending the ride.
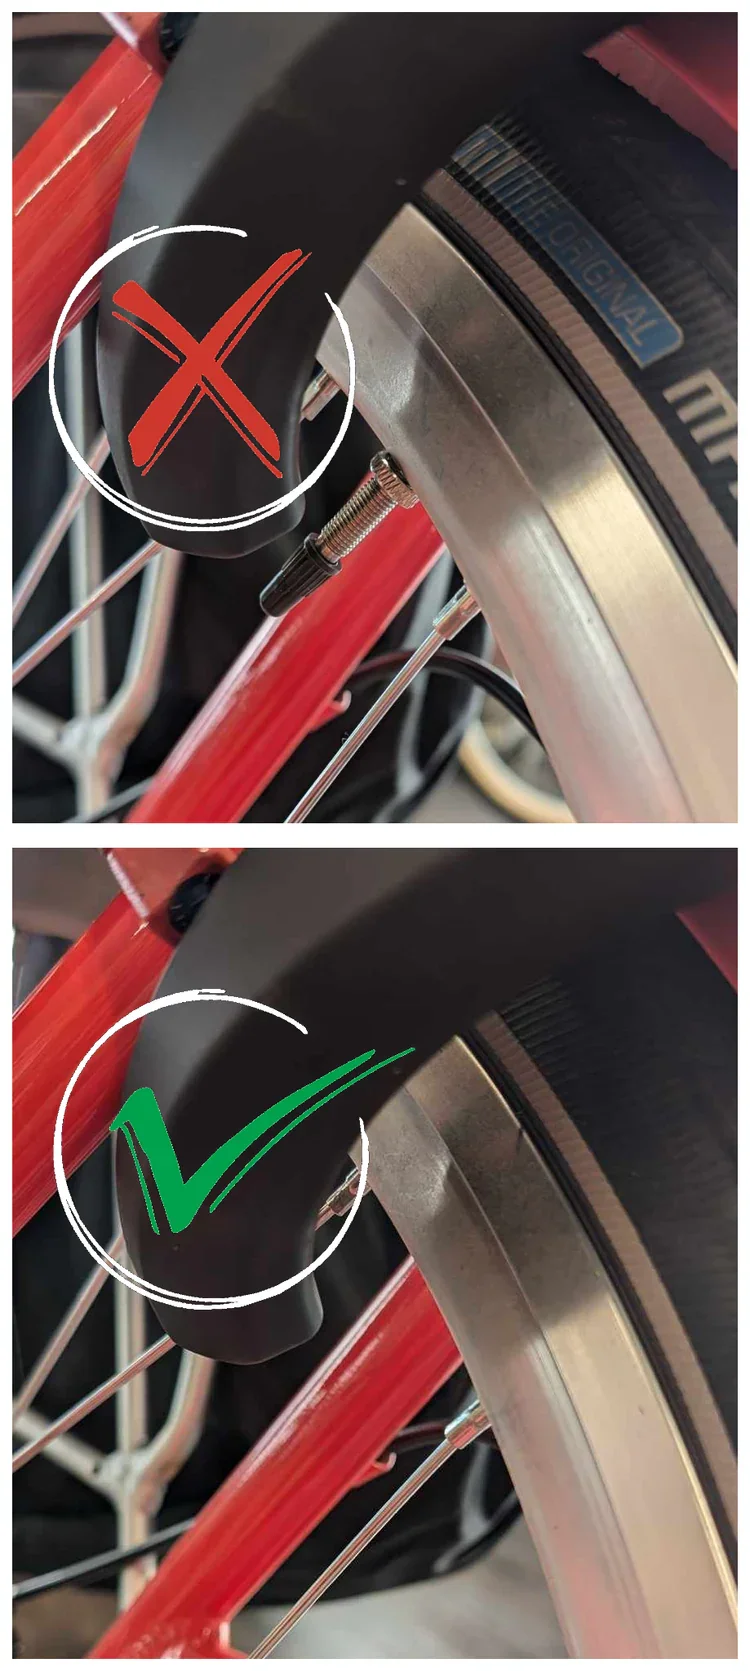
2. ENSURE THE LOCK IS FREE TO CLOSE
Visually check to ensure the lock has appropriate space to close without contacting the spokes or the air valve on the wheel.
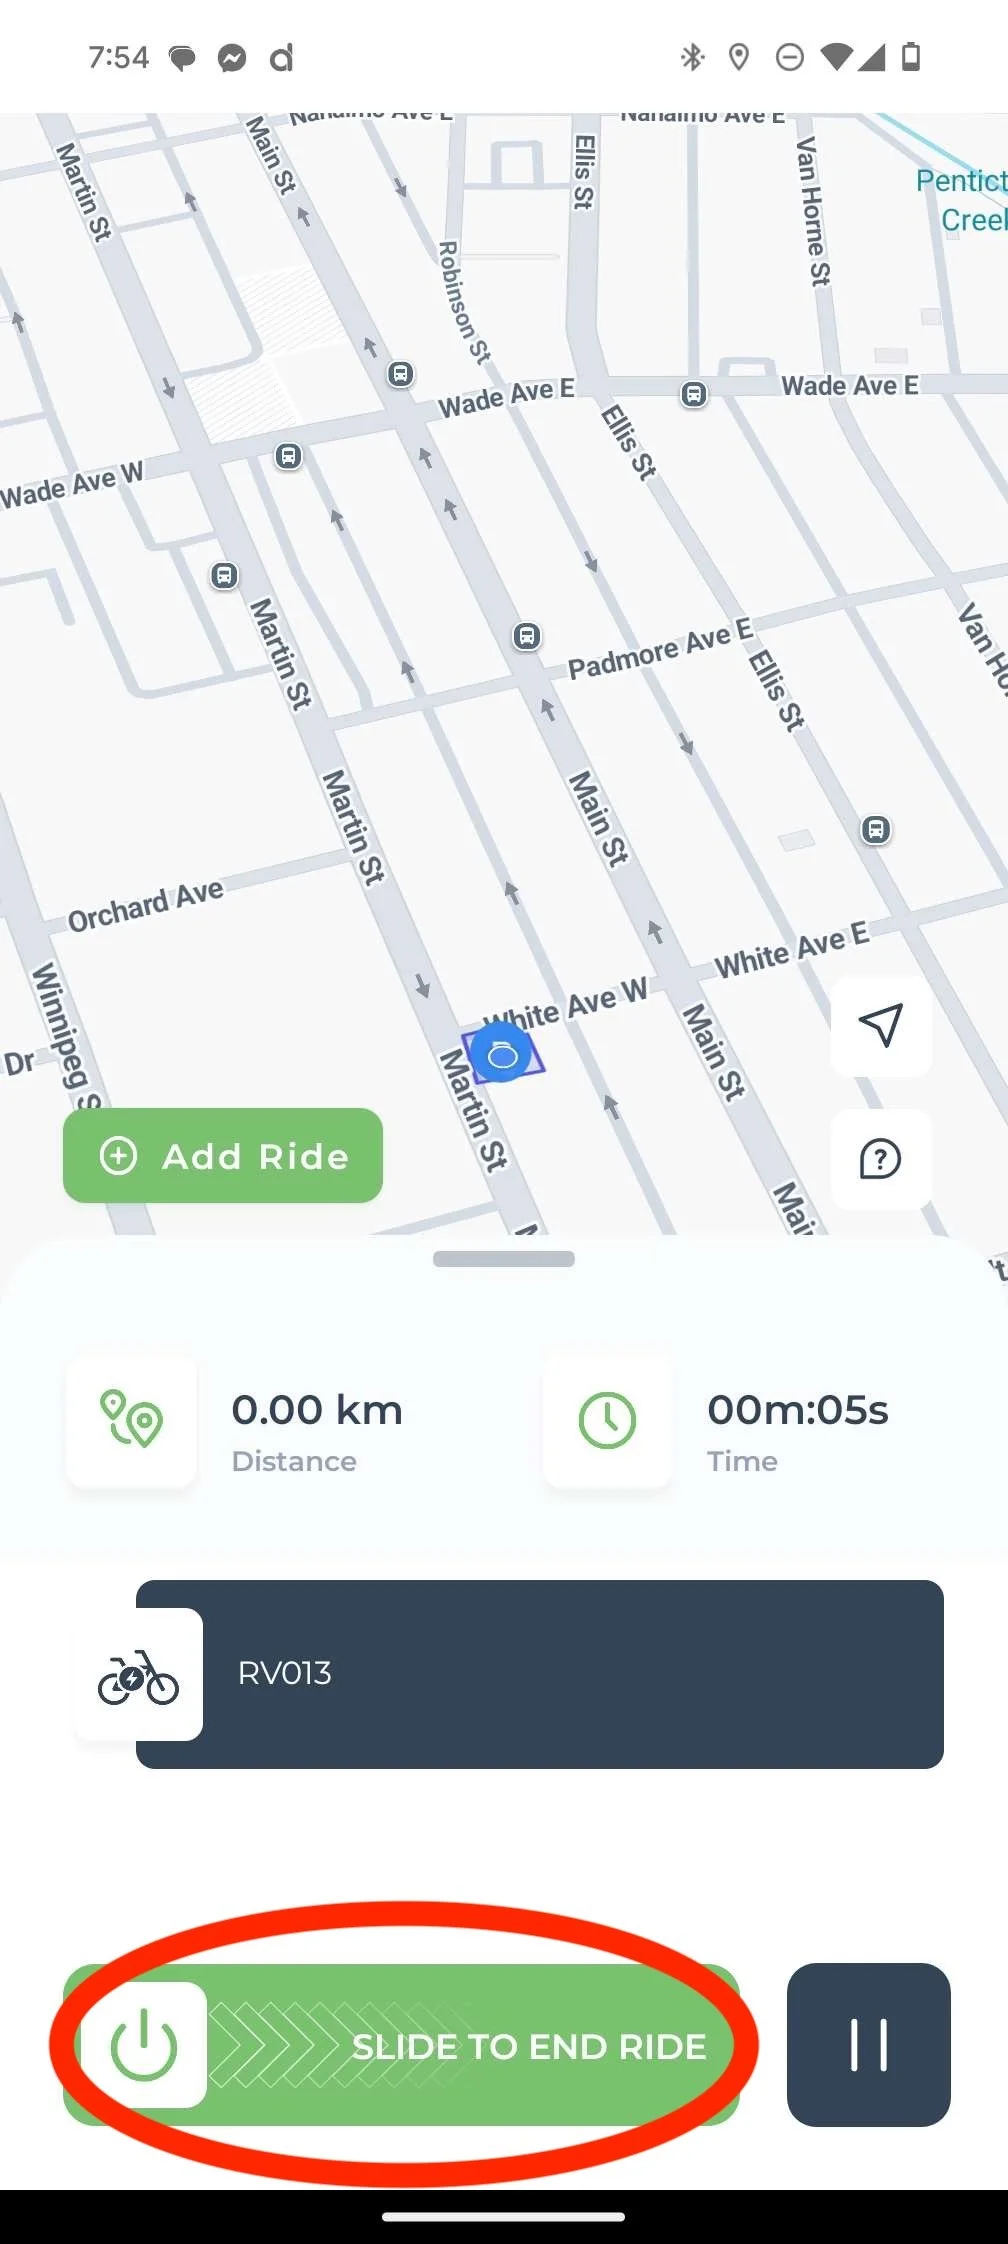
3. SWIPE TO END THE RIDE.
At the bottom of the screen you will see “Swipe to end Ride” Simply slide the power symbol from left to right to initiate the lock. When finished the lock will chime and the screen will show you the end ride stats.
RIDER RESPONSIBILITIES
HAND SIGNALS
In British Columbia Bicycles are to be ridden on the right side of the road, as close to the white lane lines as possible. Riders are not required to ride to the right of the white line, and can ride single file in the road lane way provided they are as mentioned above. While riding the on the road cyclists need to communicate with motor-vehicle drivers and do so with hand signals. Be sure to read, and understand the following hand signals, their meanings and uses before commencing your ride.

Stopping:
With your left arm, bend at the elbow 90 degrees, or as close as you can comfortably, point your fingers towards the ground with your palm facing rearwards.
Left Turn:
Hold your left arm out parallel to the ground, with your palm facing forward
Right Turn:
With your left arm, bend your arm at a 90 degree angle, or as close as you can comfortably, point your fingers up towards the sky with your palm facing forwards.
Right Turn: Alternative
Hold your right arm out parallel to the ground, with your palm facing forward.
Where to ride
Revival Velo Vehicles must be used in a manner that is supported by the laws in the Province/State of the Country in which they are rented.
For British Columbia:
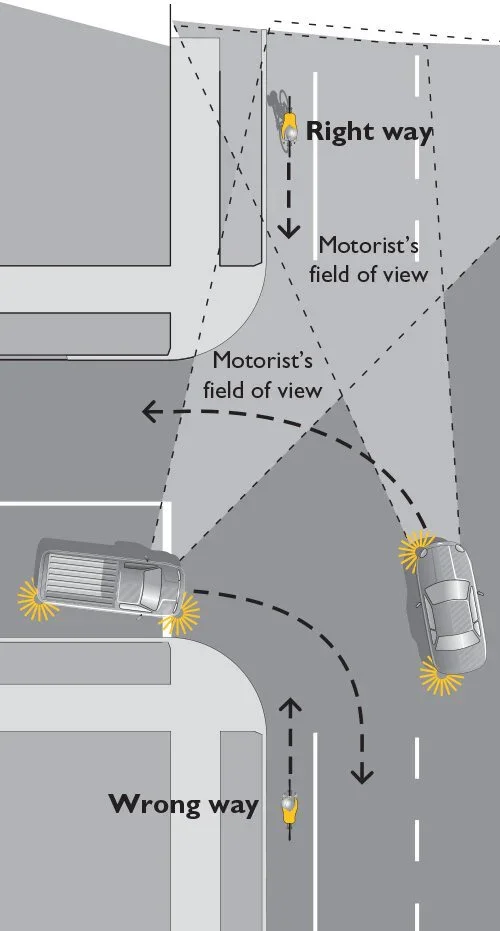
Vehicles my be used on public roadways as close to the white dividing lane lines as possible. It is not necessary to ride on the right of the lines marking the shoulder. Riders MUST be in single file and riding in the direction of traffic.
Riding against the direction of traffic creates blind spots in which drivers may not be able to see or react accordingly to riders which may lead to serious injury or death.
Riders retain the same responsibilities they would as if they were driving a standard motor vehicle and thus are required to follow the laws and suggestions of all posted signage regarding usage of the roadways, including but not limited to, Stop signs, Yield signs, Stop lights, and other applicable signage indicating road usages in the areas travelled.
Riders can not be intoxicated, and can suffer similar or worse penalties to the operation of a motor-vehicle while under the influence of controlled substances or are otherwise compromised of their usual mobility and cognitive functions.